


CSE205
Object-Oriented Programming and
Data Structures

GUI
(Graphical User Interface)
Introduction
Motivation of event driven programming
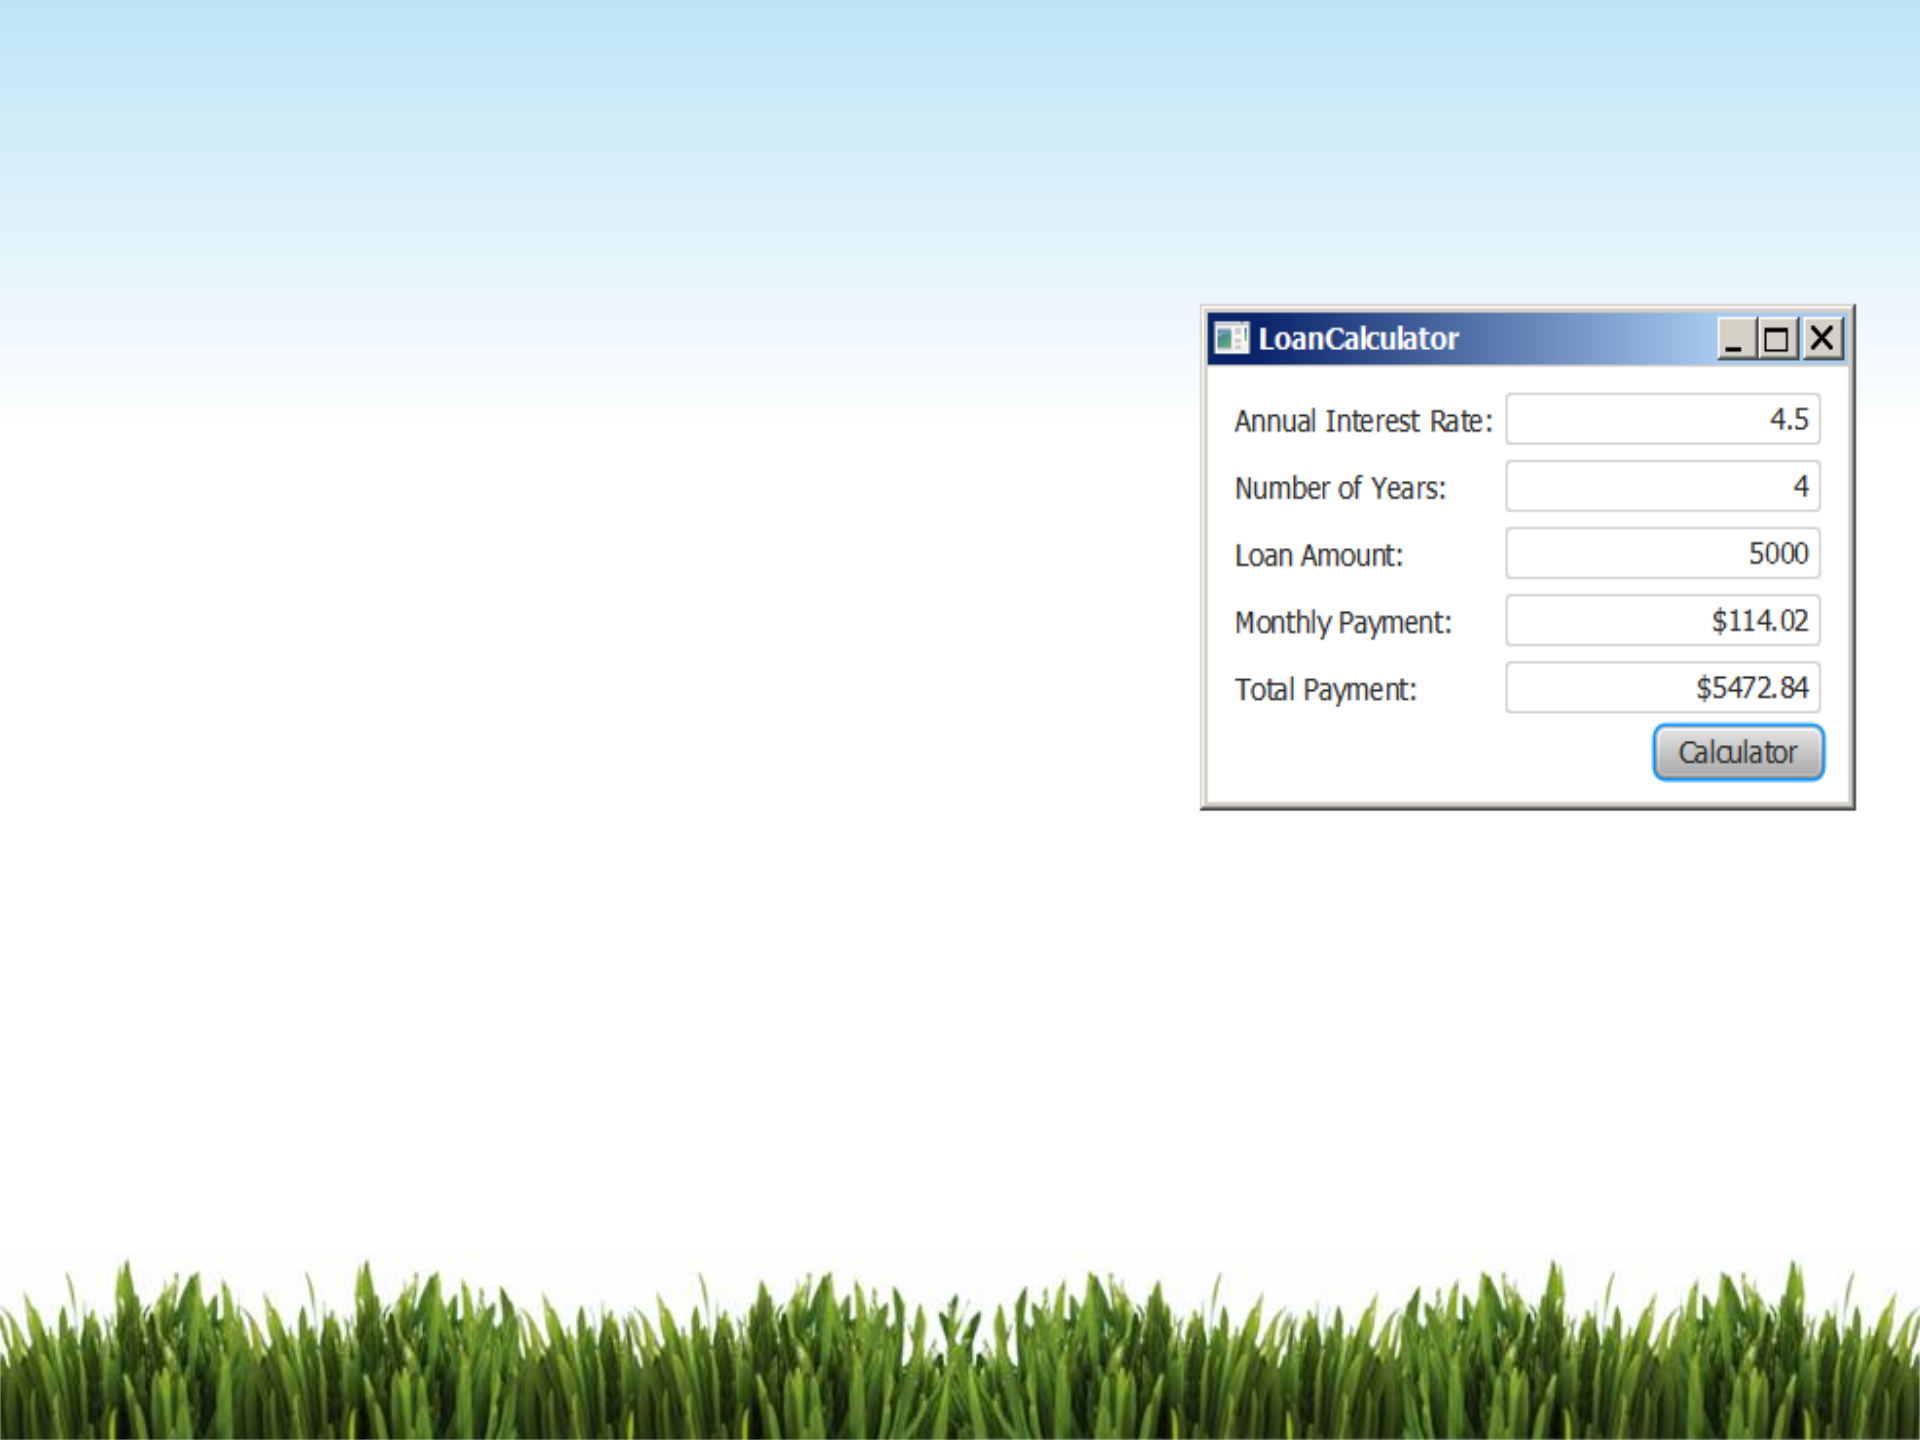
•For example, see the following GUI,
assume you want to write a GUI program
that lets the user enter a loan amount,
annual interest rate, and number of years
and once click the Calculator button, the
program will show your monthly payment
and total payment.
•To achieve this task, you have to use
event-driven programming to write the
code to respond to the button-clicking
event.

Procedural Programming Vs. Event-Driven programming
Procedural programming is executed in procedural
order. All program we wrote before are procedure
program.
In event-driven programming, code is executed
upon activation of events.

What is an event?
•In JavaFX, an event is an object that is created when
something changes within a graphical user interface. It
can also be defined as a signal to the program that
something has happened. Such as a button click
entering text into a textfield mouse movement
keystroke, etc
•The component on which an event is generated is
called the source object. Such as the button, a
textfield, keys, etc.
—
ActionEvent
—
MouseEvent
rr
=<
bo
=>
ct
=
a
3.
bm
rc
cr
Tr
—
om
—
mtr
InputEvent
ouseEvent
—
KeyEvent
|
,
JavaFX
event
classes
are
in
eee
the
Javatx
event
package
——
eee
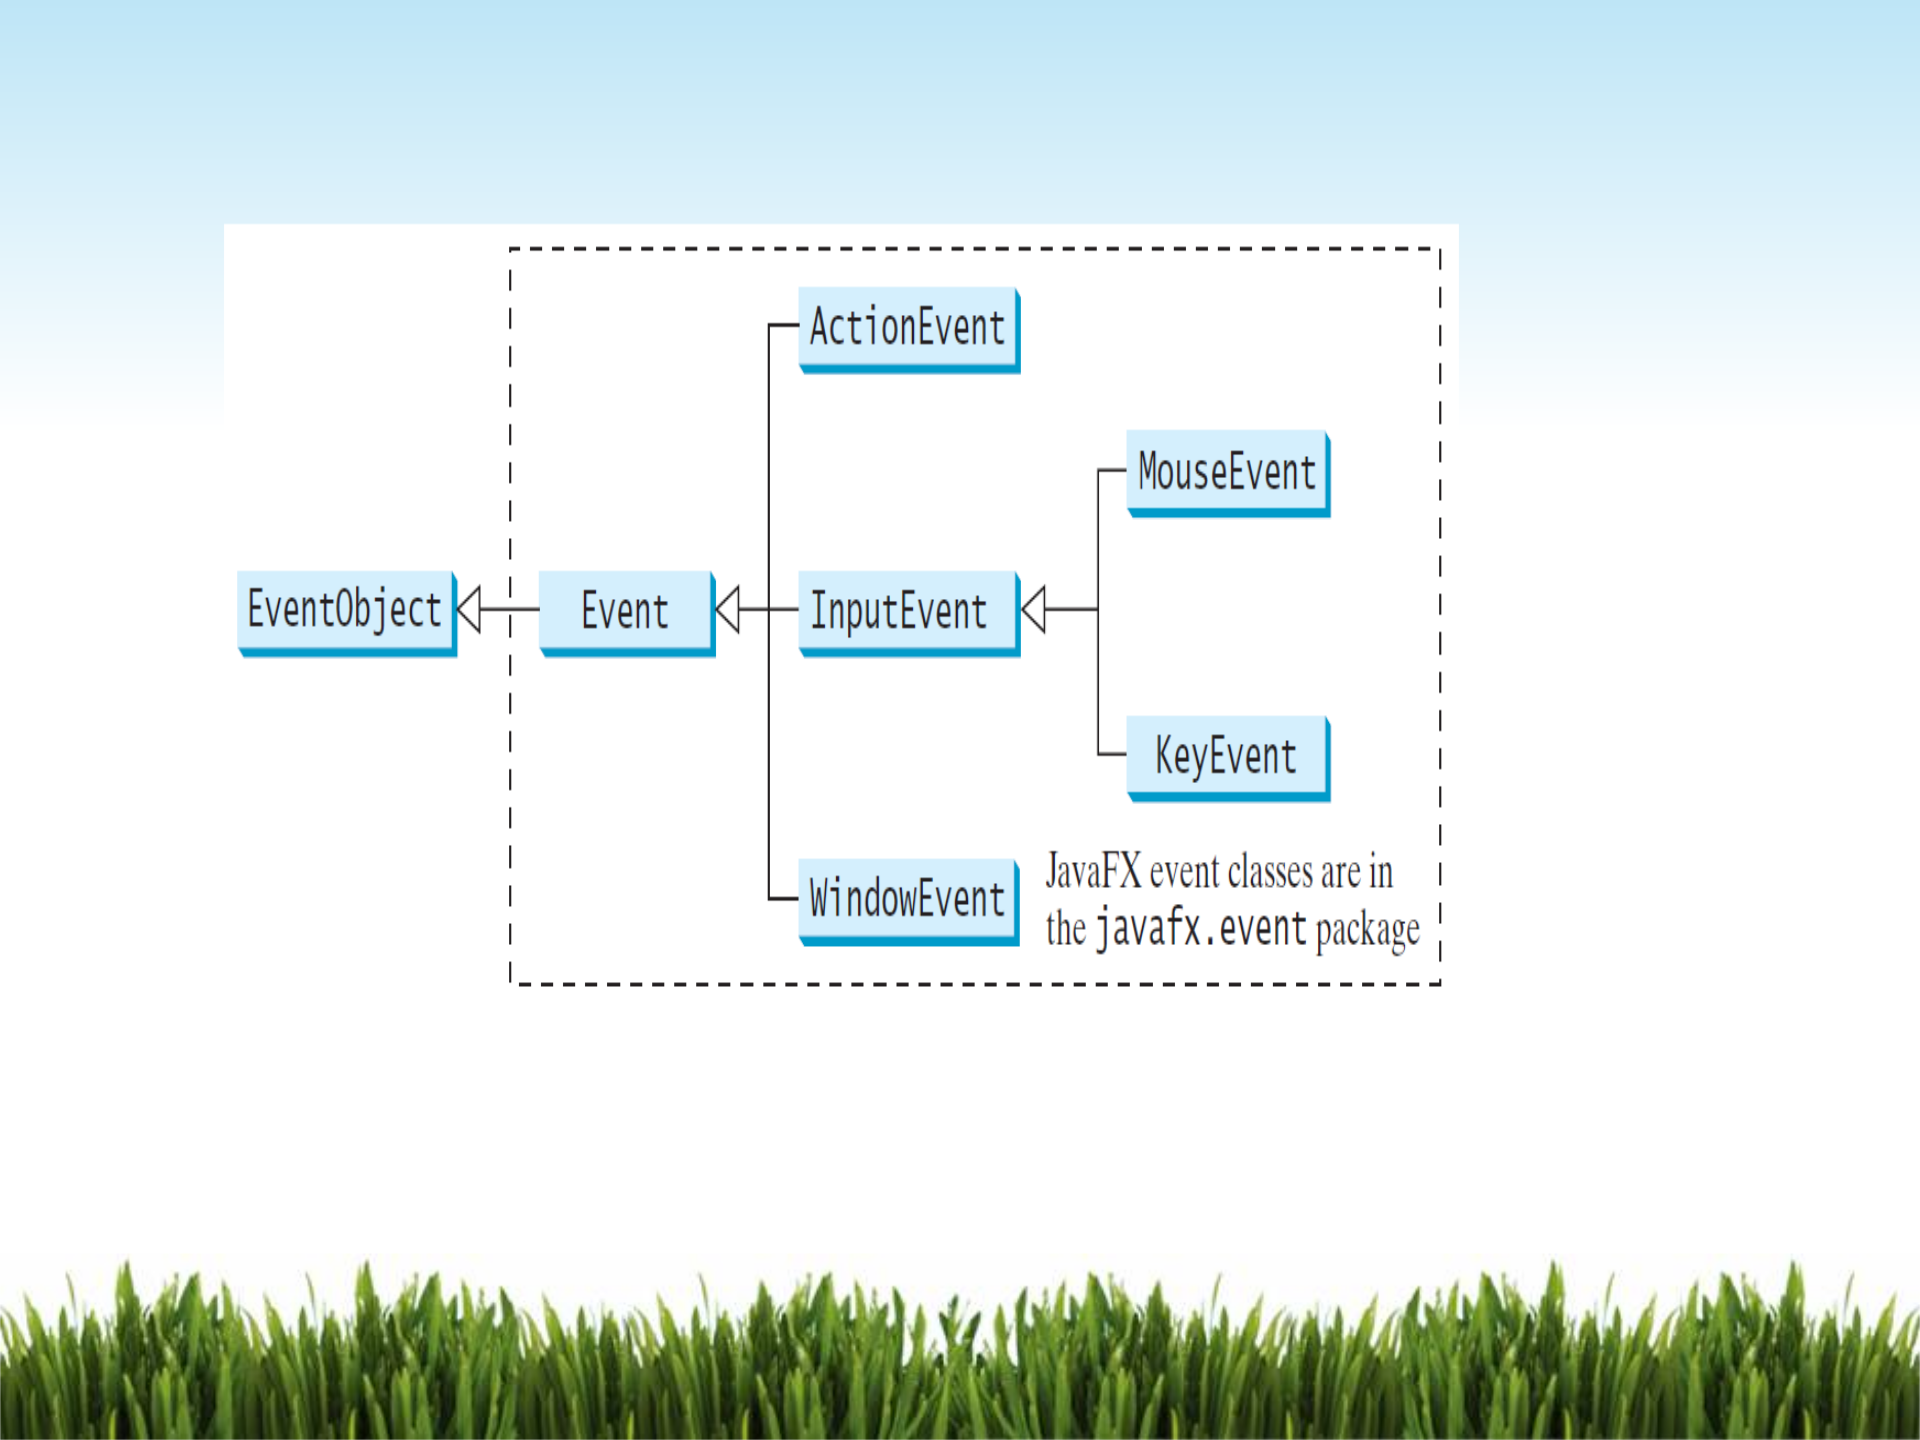
Event Classes Hierarchy
button
>
event
|
>
handler
Clicking
a
button
An
event
1s
The
event
handler
fires
an
action
event
an
object
processes
the
event
(Event
source
object)
(Event
object)
(Event
handler
object:
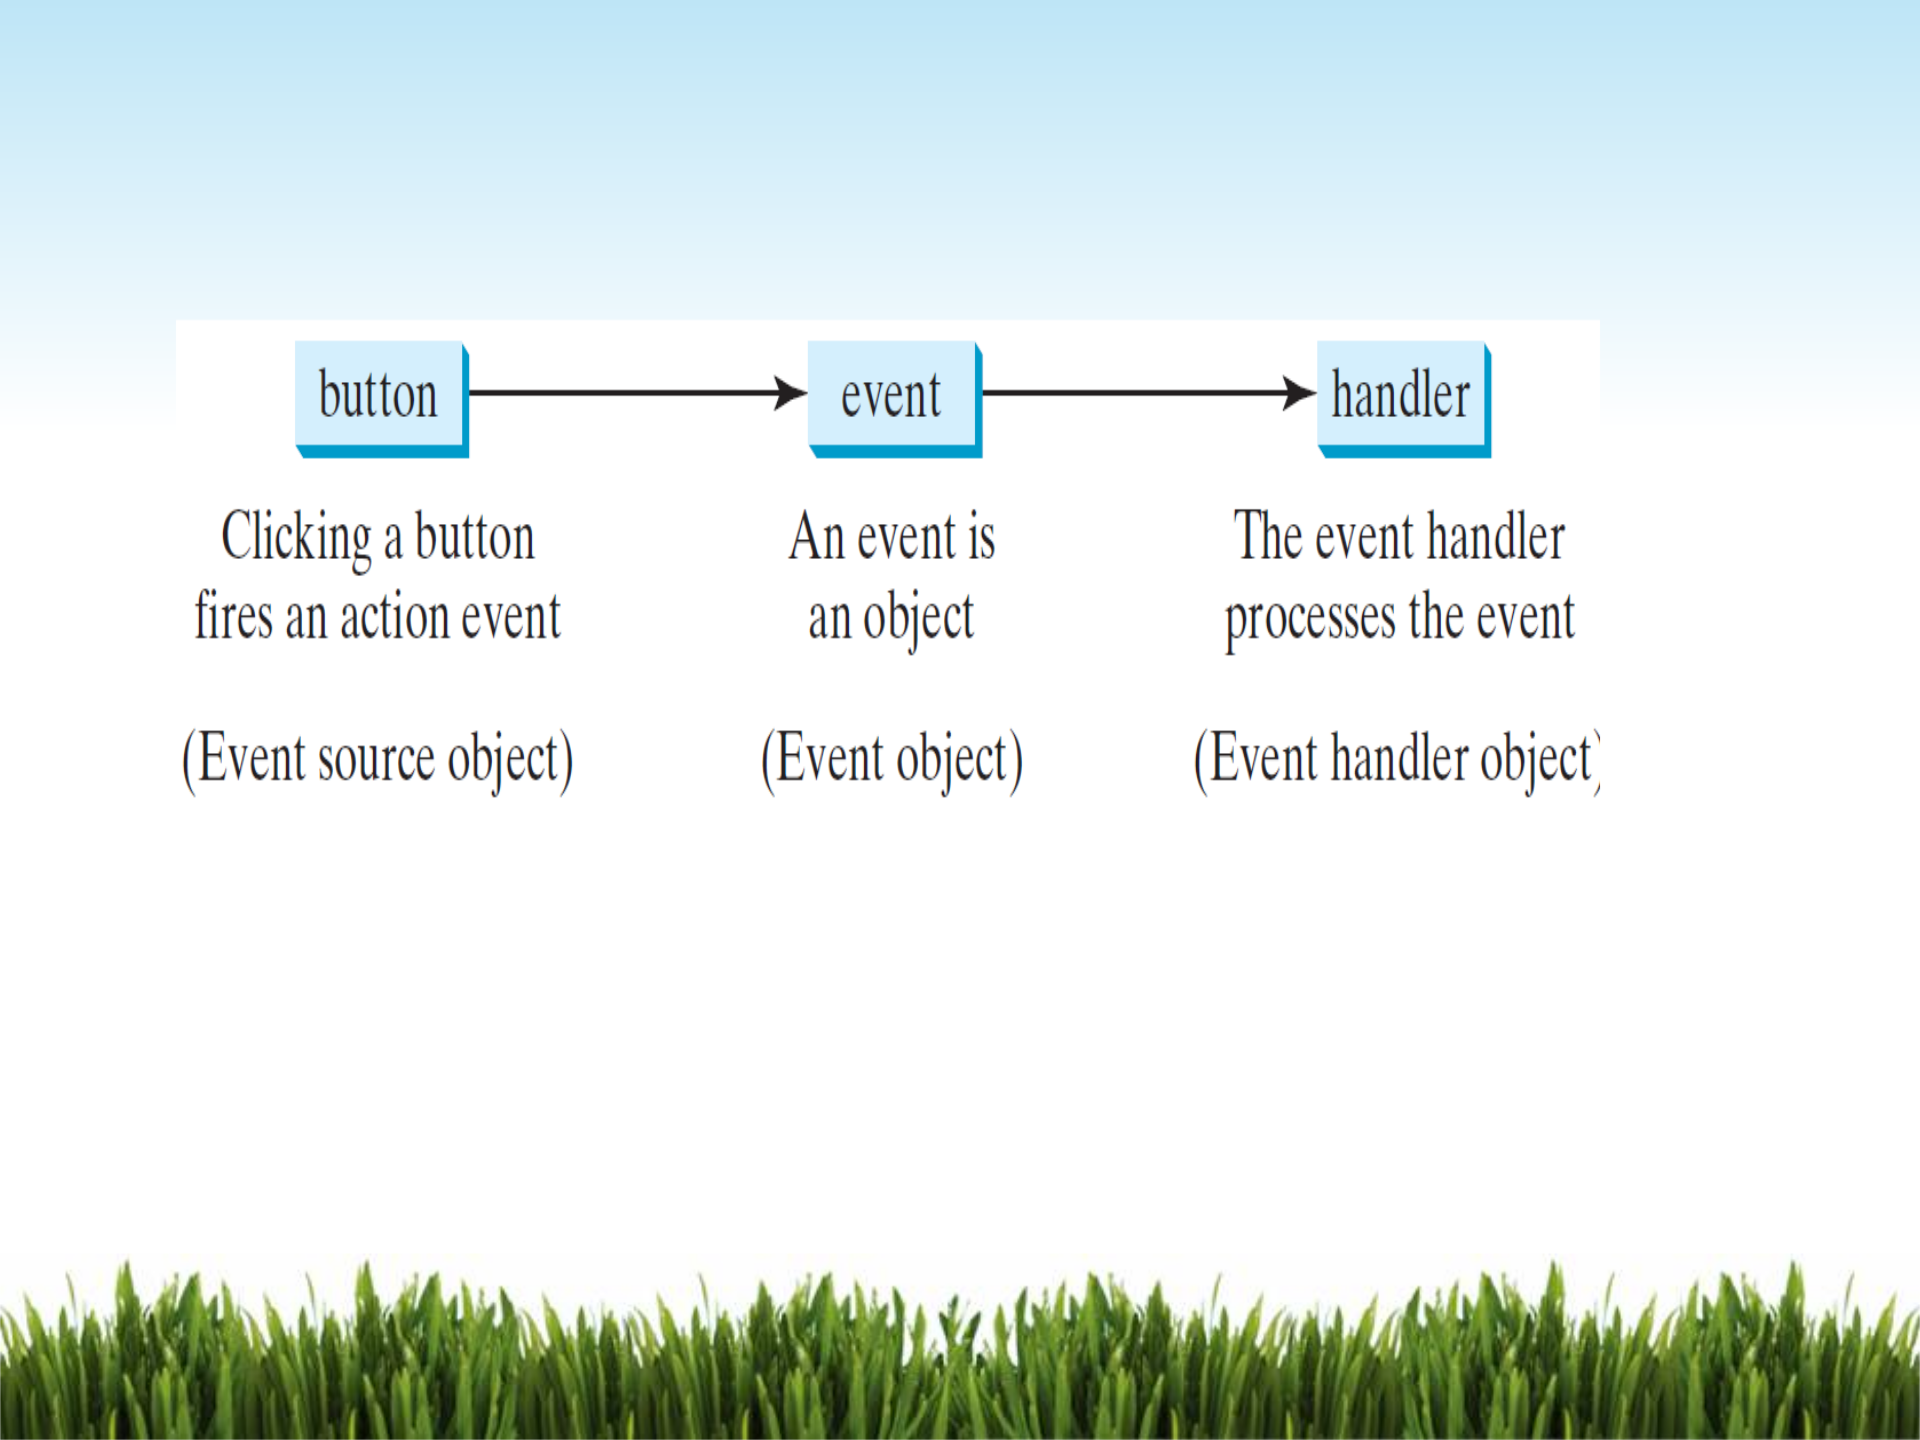
How does Java handle an event?

1. A source object that generates an event. Such as button
2. An object interested in the event handles it –
called event handler
Source objects, such as Button, TextField, TextArea, ComboBox,
ListView are defined inside javafx.scene.control.*. What we really
concern here is the event handler.
An event handling involves:

General Steps of Handling Events in JavaFX
Step #1: Define and set up the components
Initialize/create each GUI nodes, and pick/use proper layout pane to
set up the layout.
Step #2: Create a handler object by writing a class that implements
EventHandler<T extends Event> interface. This interface defines
the common behavior for all handlers. <T extends Event> denotes
that T is a generic type that is a subtype of Event.
Override the abstract method inside the handler interface, within the
method body, define what happens in response to the event of
interest.
Step #3: Register the handler with the source object by using the
setOnAction() method.
sourceObj.setOnAction(handler);

Example: let’s assume there is an okButton which we already defined
and we want to register it with a handler object. First we should design
the ButtonHandler class as follows (Note: ButtonHandler is just a class
name we picked, you can pick any other class names instead)
class ButtonHandler implements EventHandler<ActionEvent>
{
public void handle(ActionEvent e)
{
//define what happens corresponds to press the button
//……
}
}
next we need to create a handler object, this is done by calling the
constructor of ButtonHandler class.

//instantiate a ButtonHandler object by calling the constructor
ButtonHandler oneHandler = new ButtonHandler();
//source object register with the handler object
okButton.setOnAction(oneHandler);
We can also combine above two lines into one line:
okButton.setOnAction(new ButtonHandler() );
See the Example: EventHandleButtonFX.java

